其它小知识
1. ref属性
ref 被用来给元素或子组件注册引用信息(id 的替代者)
- 应用在 html 标签上获取的是真实 DOM 元素,应用在组件标签上获取的是组件实例对象 vc
- 使用方式
- 打标识:
<h1 ref="xxx"></h1>或<School ref="xxx"></School> - 获取:
this.$refs.xxx
- 打标识:
例:
src/App.vue
<template>
  <div>
    <h1 v-text="msg" ref="title"></h1>
    <button ref="btn" @click="showDOM">点我输出上方的DOM元素</button>
    <School ref="sch"></School>
  </div>
</template>

<script>
import School from './components/School.vue'

export default {
  name: 'App',
  components: {
    School
  },
  data() {
    return {
      msg: '欢迎学习Vue!'
    }
  },
  methods: {
    showDOM() {
      console.log(this.$refs.title)// 真实DOM元素
      console.log(this.$refs.btn)//真实DOM元素
      console.log(this.$refs.sch)//School组件的实例对象(vc)
    }
  }
}
</script>
src/components/School.vue
<template>
  <div class="demo">
    <h2>学校名称:{{ name }}</h2>
    <h2>学校地址:{{ address }}</h2>
    <button @click="showName">点我提示学校名</button>
  </div>
</template>
<script>
export default {
  name: "School",
  data() {
    return {
      name: "QFNU",
      address: "曲阜",
    }
  },
  methods: {
    showName() {
      alert(this.name)
    }
  }
}
</script>
<style>
.demo {
  background-color: orange;
}
</style>
效果:

2. props配置项
功能:props 让组件接收外部传过来的数据
props 适用于:
父组件 ==> 子组件通信子组件 ==> 父组件通信(要求父组件先给子组件一个函数)
2.1 传递数据
<Demo name="xxx" :age="18"/> 这里 age 前加 :,通过 v-bind 使得里面的 18 是数字,否则 Vue 会认为是字符串,即只有传递字符串时不加 :
2.2 接收数据
第一种方式(只接收)
props:['name','age']
第二种方式(限制类型)
props:{name:String, age:Number}
第三种方式(限制类型、限制必要性、指定默认值)
props: {
    name: {
        type: String,	 // 类型
        required: true,// 必要性
        default: 'cess'// 默认值
    }
}
备注:props 是只读的,Vue 底层会监测你对 props 的修改,如果进行了修改,就会发出警告,若业务需求确实需要修改,那么请复制 props 的内容到 data 中,然后去修改 data 中的数据
例:
src/App.vue
<template>
  <div>
    <Student name="李四" sex="女" :age="18"></Student>
    <Student name="王五" sex="男" :age="20"></Student>
  </div>
</template>

<script>
import Student from './components/Student.vue'

export default {
  name: 'App',
  components: {
    Student
  }
}
</script>
src/components/Student.vue
<template>
  <div>
    <h1>{{ msg }}</h1>
    <h2>学生姓名:{{ name }}</h2>
    <h2>学生性别:{{ sex }}</h2>
    <h2>学生年龄:{{ myAge + 1 }}</h2>
    <button @click="updateAge">尝试修改收到的年龄</button>
  </div>
</template>

<script>
export default {
  name: 'Student',
  data() {
    return {
      msg: "我是QFNU的学生",
      myAge: this.age,
    }
  },
  methods: {
    updateAge() {
      this.myAge++
    }
  },
  // 简单声明接收
  //props: ['name', 'age', 'sex']
  //接收的同时对数据进行类型限制
  // props: {
  //   name: String,
  //   age: Number,
  //   sex: String,
  // }
  // 接收的同时对数据:进行类型限制+默认值的指定+必要性的限制
  props: {
    name: {
      type: String, 	//name的类型是字符串
      required: true, //name是必要的
    },
    age: {
      type: Number,
      default: 99, //默认值
    },
    sex: {
      type: String,
      required: true,
    },
  },
}
</script>
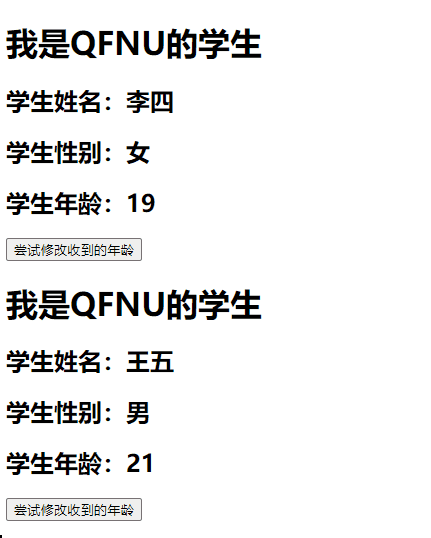
效果:
3. mixin混入
功能:可以把多个组件共用的配置提取成一个混入对象
使用方式:
先定义混入
const mixin = {
    data() {....},
    methods: {....}
    ....
}
再使用混入
- 全局混入
Vue.mixin(xxx) - 局部混入
mixins:['xxx']
备注:组件和混入对象含有同名选项时,这些选项将以恰当的方式进行“合并”,在发生冲突时以组件优先
var mixin = {
	data: function () {
		return {
    		message: 'hello',
            foo: 'abc'
    	}
  	}
}

new Vue({
  	mixins: [mixin],
  	data () {
    	return {
      		message: 'goodbye',
            	bar: 'def'
    	}
    },
  	created () {
    	console.log(this.$data)
    	// => { message: "goodbye", foo: "abc", bar: "def" }
  	}
})
同名生命周期钩子将合并为一个数组,因此都将被调用。另外,混入对象的钩子将在组件自身钩子之前调用
var mixin = {
  	created () {
    	console.log('混入对象的钩子被调用')
  	}
}

new Vue({
  	mixins: [mixin],
  	created () {
    	console.log('组件钩子被调用')
  	}
})

// => "混入对象的钩子被调用"
// => "组件钩子被调用"
例:
src/mixin.js
export const hunhe = {
  methods: {
    showName() {
      alert(this.name)
    },
  },
  mounted() {
    console.log('你好啊!')
  },
}
export const hunhe2 = {
  data() {
    return {
      x: 100,
      y: 200,
    }
  },
}
src/components/School.vue
<template>
  <div>
    <h2 @click="showName">学校名称:{{ name }}</h2>
    <h2>学校地址:{{ address }}</h2>
  </div>
</template>

<script>
//引入一个hunhe、hunhe2
import { hunhe, hunhe2 } from '../mixin'
export default {
  name: 'School',
  data() {
    return {
      name: 'QFNU',
      address: '山东',
      x: 666
    }
  },
  mixins: [hunhe, hunhe2]	// 局部混入
}
</script>
src/components/Student.vue
<template>
  <div>
    <h2 @click="showName">学生姓名:{{ name }}</h2>
    <h2>学生性别:{{ sex }}</h2>
  </div>
</template>
<script>
import { hunhe, hunhe2 } from '../mixin'
export default {
  name: 'Student',
  data() {
    return {
      name: '张三',
      sex: '男'
    }
  },
  mixins: [hunhe, hunhe2]	// 局部混入
}
</script>
src/App.vue
<template>
  <div>
    <School></School>
    <hr>
    <Student></Student>
  </div>
</template>

<script>
import School from './components/School.vue'
import Student from './components/Student.vue'
export default {
  name: 'App',
  components: {
    School, Student
  }
}
</script>
src/main.js
import Vue from 'vue'
import App from './App.vue'
// import {mixin} from './mixin'

Vue.config.productionTip = false
// Vue.mixin(hunhe)		// 全局混合引入
// Vue.mixin(hunhe2)	// 全局混合引入

new Vue({
  render: (h) => h(App),
}).$mount('#app')
效果:

4. plugin插件
功能:用于增强 Vue
本质:包含 install 方法的一个对象,install 的第一个参数是 Vue,第二个以后的参数是插件使用者传递的数据
定义插件(见下 src/plugin.js)
使用插件:Vue.use()
例:
src/plugins.js
export default {
  install(Vue, x, y, z) {
    console.log(x, y, z)
    //全局过滤器
    Vue.filter('mySlice', function (value) {
      return value.slice(0, 4)
    })
    //定义全局指令
    Vue.directive('fbind', {
      //指令与元素成功绑定时(一上来)
      bind(element, binding) {
        element.value = binding.value
      },
      //指令所在元素被插入页面时
      inserted(element, binding) {
        element.focus()
      },
      //指令所在的模板被重新解析时
      update(element, binding) {
        element.value = binding.value
      },
    })
    //定义混入
    Vue.mixin({
      data() {
        return { x: 100, y: 200 }
      },
    })
    //给Vue原型上添加一个方法(vm和vc就都能用了)
    Vue.prototype.hello = () => {
      alert('你好啊')
    }
  },
}
src/main.js
import Vue from 'vue'
import App from './App.vue'
import plugins from './plugins'	// 引入插件

Vue.config.productionTip = false

Vue.use(plugins,1,2,3)	// 应用(使用)插件

new Vue({
	el:'#app',
	render: h => h(App)
})
src/components/School.vue
<template>
  <div>
    <h2>学校名称:{{ name | mySlice }}</h2>
    <h2>学校地址:{{ address }}</h2>
    <button @click="test">点我测试一个hello方法</button>
  </div>
</template>

<script>
export default {
  name: 'School',
  data() {
    return {
      name: '曲阜师范大学QFNU',
      address: '山东',
    }
  },
  methods: {
    test() {
      this.hello()
    }
  },
}
</script>
src/components/Student.vue
<template>
  <div>
    <h2>学生姓名:{{ name }}</h2>
    <h2>学生性别:{{ sex }}</h2>
    <input type="text" v-fbind:value="name">
  </div>
</template>

<script>
  export default {
    name:'Student',
    data() {
      return {
        name:'张三',
        sex:'男'
      }
    },
  }
</script>
src/App.vue
<template>
  <div>
    <School></School>
    <Student></Student>
  </div>
</template>

<script>
import School from './components/School.vue'
import Student from './components/Student.vue'
export default {
  name: 'App',
  components: {
    School, Student
  }
}
</script>
效果:

5. scoped样式
作用:让样式在局部生效,防止冲突
写法:<style scoped>
6. $nextTick
这是一个生命周期钩子
语法:this.$nextTick(回调函数)
作用:在下一次 DOM 更新结束后执行其指定的回调
什么时候用:当改变数据后,要基于更新后的新 DOM 进行某些操作时,要在 $nextTick 所指定的回调函数中执行
比如:点击编辑按钮使文本变成表单且自动获取焦点
点击表单时会用一个布尔值配合v-show使表单显示,可是改变布尔值的时候,后面的focus方法会跟着执行,然后再渲染模板
例:
src/App.vue
<template>
  <div>
    <Test></Test>
  </div>
</template>

<script>
import Test from './components/Test.vue'

export default {
  name: 'App',
  components: {
    Test
  }
}
</script>
src/components/Test.vue
<template>
  <div>
    <label>
      <span v-show="!showInput">{{ msg }}</span>
      <input type="text" v-show="showInput" :value="msg" ref="editMsg" @blur="handleBlur($event)">
    </label>
    <br>
    <br>
    <button @click="edit">编辑</button>
  </div>
</template>

<script>
export default {
  name: 'Test',
  data() {
    return {
      showInput: false,
      msg: '你好',
    }
  },
  methods: {
    edit() {
      this.showInput = true
      this.$nextTick(function () {
        this.$refs.editMsg.focus()
      })
    },
    handleBlur(e) {
      this.showInput = false
      this.msg = e.target.value
      console.log(e.target.value)
    }
  }
}
</script>
效果:
